Showing posts with label Baby gift. Show all posts

Wednesday, 31 July 2013

Introducing... Barrington, Vladimir and Benedict bears!

Earlier this year I had a go at making knitted bears! Several of my close friends have had babies this year, and I have got a bit addicted to knitting them the King Cole Cuddles Chunky bears! These little dudes are knit from a pattern by King Cole specifically for the Cuddles Chunky yarn made by King Cole, and they take hardly any time at all.

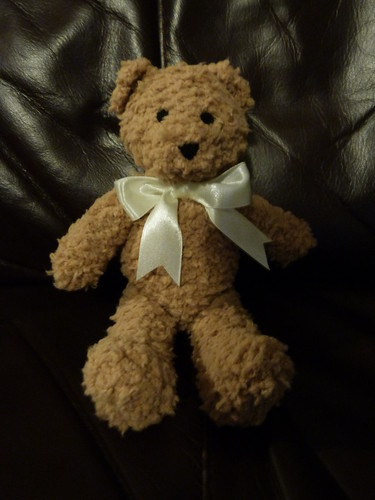
The yarn itself is a furry yarn, which definitely lives up to the "cuddles" in the name! It was initially horrible to knit with, and I used much more yarn for the first bear than you need as I kept getting lost and confused, and having to start again as it's not very easy to "unknit". However by the time I finished Vladimir, the second bear, I was quite used to it, and I think if you are careful you could probably knit two bears out of one 50g ball. 

I started with embroidered eyes and nose, but switched to felt features out of pure laziness on the second two. I'm pleased I did as I like the effect and it takes some of the stress out, as I'm often on a tight deadline with these little guys.

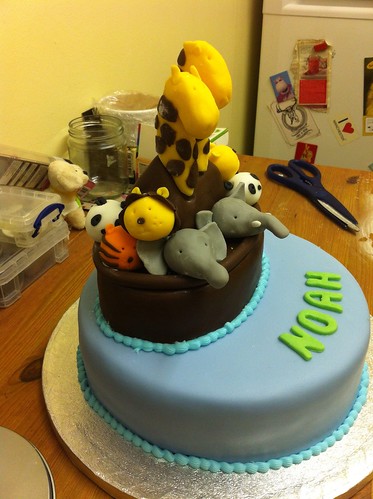
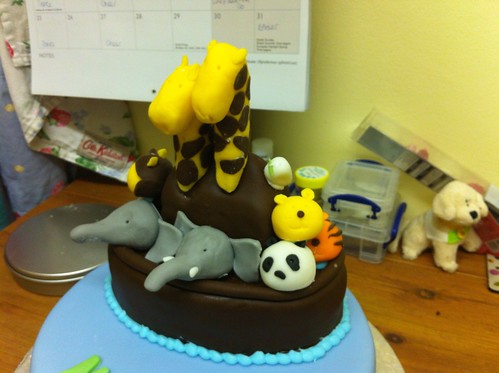
So... meet Barrington! He's the first little bear I knit, and he is in his new home with his new friend Noah who arrived at the end of March. I used the blue "mottled" yarn for Barrington, as I knew Noah was a boy baby, and I liked the colour pattern.

Barrington Bear!


This, is Vladimir! He is now in his new home with his new friend Zoe. I used the brown yarn for Vladimir, who was so named as Zoe's Dad was threatening to name the new baby Vladimir (if Zoe had been a boy), so the girls at the baby shower christened the bear so he couldn't use the name for the baby! I think I like the brown yarn the best as it looks just like "proper" bear fur. 


Vladimir Bear for Lorna 1305 (2)
Vladimir Bear!

And finally, this is Benedict! Benedict lives with his new friend Esme. I used the cream yarn for him as I needed a unisex colour and wanted something different to the brown I used last. He was named after Benedict Cumberbatch, as Esme's mum and I are both fans, and it's almost like "Benedick" after one of our favourite Shakespearean characters!
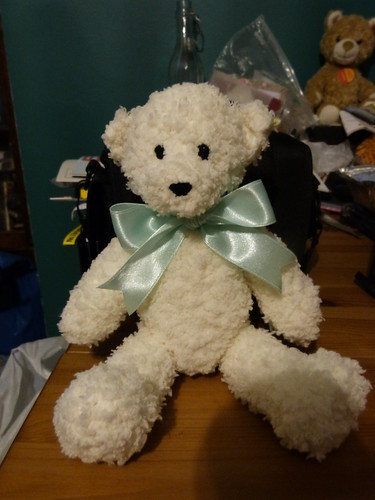

Benedict Bear for Emma 1305 (2)
Benedict Bear!

I'm sure there will be more of these little guys - they're super quick and easy to make, and I just love how different they look depending on how tightly you stuff them, the position of the ears, and the facial features. And it's so lovely giving a new person a nice snuggly new friend you've made yourself.

Have you made any snuggly friends for anyone? I'd love to hear about them.

Sunday, 16 June 2013

Noah's ark cake

After successfully completing my first ever self-designed "big cake" at Christmas, I was itching for an opportunity to get making one without the supervision of my college tutor. Most of my friends are now married, so a wedding cake seemed unlikely. Luckily, the married folk are now having babies, so an opportunity arose to make a cake for my friend Susie's baby shower.

Being the prepared sort, Susie already knew she was having a boy, and had already revealed that he would be called Noah, so the cake really designed itself! I decided to make a Noah's ark cake, and created a secret Pinterest board to capture pictures of inspirational cakes. Now, if you haven't done an Internet search for "Noah's ark cake", let me tell you there are LOADS. They vary from pastel colours to bright colours, one tier to many tiers, water or no water, Noah or no Noah (animals only), waves or calm, rainbow or plain, etc. I decided to stick to my style, which appears to be - plain and simple! I like clean lines, with not much fuss, and having only done a little modelling, decided I wasn't ready for people and stuck to animals.

I chose to bake a chocolate cake, and used the chocolate truffle cake from the Great British Bake Off Showstoppers book. This was partly because the recipe in the book gives you the quantities and timing to bake a 6 inch, 8 inch or 10 inch cake, and I used the 10inch and 6 inch cakes. The 10 inch is my base, and the 6 inch I used to make the Ark itself. I was lucky enough to find a 6 inch long oval cake board, and this made the template for the ark, and then I used the trimmings to fashion the cabin of the ark. The pieces were glued together with ganache, and then I covered it with Renshaw's chocolate flavour and colour sugar paste.

Noah's ark

The main cake would be covered in Renshaw's baby blue sugarpaste, and with that in mind, I wanted to choose the animals to give a good mixture of colours. I decided on - giraffes, tigers, lions, elephants, pandas, and a dove, complete with olive branch. It was very daunting modelling the animals, but in the end I just went for it, starting with the lions, and finishing with the dove (because I was most scared of him!). The key was to get the heads just the right size, and in the end they only just fit on (and even then some of the heads were partly hidden).

I used dowels in the base cake to make sure the ark and heads didn't sink into it, and although I'd never done this before it was pretty easy. It was tricky marking the plastic dowels without marking the icing with the knife (I didn't manage it, but smoothed the marks out easily enough), but once that was done, they snapped no problem.

Once the ark was in place I made up a little royal icing, and coloured it blue to match the sugarpaste as closely as I possibly could! I then used this to pipe shells around the based of the cake, and around the ark base. Then it was time to add the animals! I used spaghetti in the giraffe necks to stick into the ark to strengthen them, and the other heads were just glued in place with a little royal icing. Unfortunately, the giraffe's strengthening spaghetti insides were not quite strong enough, and they snapped overnight, but there was limited damage to the ark, and they stayed up long enough at the party for photos.

The finishing touch was to add "NOAH" in green icing, to break up the blue and add that little personal touch to the cake. The girls loved the cake, and Susie did say she wasn't sure she could cut it, but I made sure we did as I wanted some of that lovely truffle cake! (I tasted the trimmings and it's a properly gorgeous tasting cake - my new favourite go-to recipe I think).

Noah's ark

Noah's ark

Noah's ark

I loved making this cake, and can now add "tiered cakes" to my list of skills! I'm currently doing another course, so another big cake is on its way. Watch this space...

Friday, 22 June 2012

Crochet bear baby gift

We spend more of our time in work than almost anywhere else, so when you have good people around you it really does make life easier.

Today, we said a temporary good bye to a very good person to have around you, as our friend (and colleague) Jen left to have her baby. It only seems about 5 minutes since she announced her pregnancy, but yet here we are, 6 months later and there's only two weeks before the little one arrives.

We did a collection, and really splashed out on some lovely things. But some of us also got our own little gifts, and I wanted to use my new found crochet skills to create something special.

Until now I had been crocheting from patterns I found on the Internet, but I recently bought a book of crochet - Cute & Easy Crochet by Nicki Trench. I got it from our work drop from The Book People for the absolute bargain price of £4, and had a flick through almost every day planning projects.

The bear pattern really stood out, and even though it was in the section with the highest level of difficulty, I had a good feeling about it, as the pattern looked fairly simple.

As Jen doesn't know the sex of her baby, I decided a neutral colour was the way to go, and really thought that a cream bear would be very lovely, so I got some nice soft double knit wool from Leeds Market, and off I went.

Bear was constructed in two main sections for body and head, stuffing each before the crochet is finished. Eyes are added before the head is stuffed, and I bought a bag of safety eyes from Hobbycraft rather than stitching eyes on. The ears were stitched as four individual pieces. Each ear was assembled by double crocheting two pieces together, and then stitching onto the head with more wool (I used the loose ends to do this rather than cut fresh wool). Here is the body and head, once the ears had been assembled:


You can see his little face starting to take shape here, but to complete his personality, he needed a nose and a mouth. My other hobbies helped here. I like to embroider, but also in the past have had a go at making teddy bears. This was during the phase my Mum went through of making jointed teddy bears, and I used one of her books to make a couple of very simple non-jointed mini-bears out of some offcuts of mohair she had left. Anyway, the point is that as part of this crafting I learnt how to embroider noses and mouths on bears. This came in very handy as I free styled this little guy's face. After embroidering the expression on, I drew the thread through his head to come out where the head will be stitched onto the body, so I could tie a knot, and hide it in the join. You can just see the thread hanging down under the head in this picture of his finished face:


Once his head was finished, all that was left was to stitch him together. I had already crocheted 4 arms and legs. This was actually quite tricky. The trouble was that after the bit of instruction for the paw, the leg/arm bit was just left to the crocheter to complete and keep going until the limb was 12cm long. So it was quite tricky to match them up. In the end I tried to match the arms and legs to be fairly even and as luck would have it ended up with two that were slightly thinner and longer (used for arms) than the other two (used for legs).

Then I just had to position the limbs on his body and stitch! I finished him off with a fetching green bow (baby neutral again!), and he was ready to meet Jen and her bump!


I was a little bit sad to see him go, but I know that Jen's little one will be the best parent for him in the future! (And I might make one of my own!)